What's New

Welcome to my blog where I post tutorials, family adventures, art projects, cleaning and organizing ideas, plus any other bright ideas that pop in my head. Hope you enjoy them!

Main Posts Background Image

Main Posts Background Image
Showing posts with label gifts. Show all posts

6.5.15

Adorable Sock Monkeys - You Can't Make Just One!


I hate to admit it but I have an addiction--Sock Monkeys! Last Christmas my daughter, who is a big Pinterest fan, called on Skype and said, "Momma,we're making sock monkeys! Here's the link to some mens' socks from Amazon." So of course I agreed to do it. I'm not one to skip a chance to make something crafty!


She told me to buy men's large colorful dress socks. I bought this collection of fancy stripe colorful cotton socks because I needed at least 8 pair! 


Aren't they so cuUute??!


You see, she knew I was facing a year of grandbaby birthdays-- eight to be exact and we miss sewing together so much! Sock monkey making was the perfect mother-daughter activity. So we hung out via  Skype, sewed a few monkeys and had a fun girly afternoon.  I sure miss my girl!


These monkeys are just adorable! (Not referring to the grandkids here. Haha!) My grandkids love them and boy do their monkeys get a workout! Be sure to sew sturdy stitches!  I've made several but have about five more to do.


The funny part is how much grown ups like these cuties. I had a blast taking pictures and posing these guys.  I know. I'm not supposed to be playing with toys, but I never had a sock monkey and now I want one.

Amanda with River holding her brother's monkey.

In fact, a month ago I ran out of gas right in front of an antique shop--boo-hoo! lol I got to chatting with the store owner while waiting for my son to pick me up and showed her this fella on my phone and she ordered one for herself and asked me to make several to try to sell in the shop. Sweeet!


Tip: It really helps to use a walking foot. Quilters use them a lot so I had one on hand. Be sure to get one that will fit your machine. The one I linked to is for Singers.

 My sister called saying she was having a lot of trouble and it turned out she just needed that foot so that both the upper fabric and lower fabric move beneath the needle at the same speed.


Everyone needs a sock monkey in my opinion or maybe several! Don't you think?

Happy Homemaking!
Donna

20.12.10

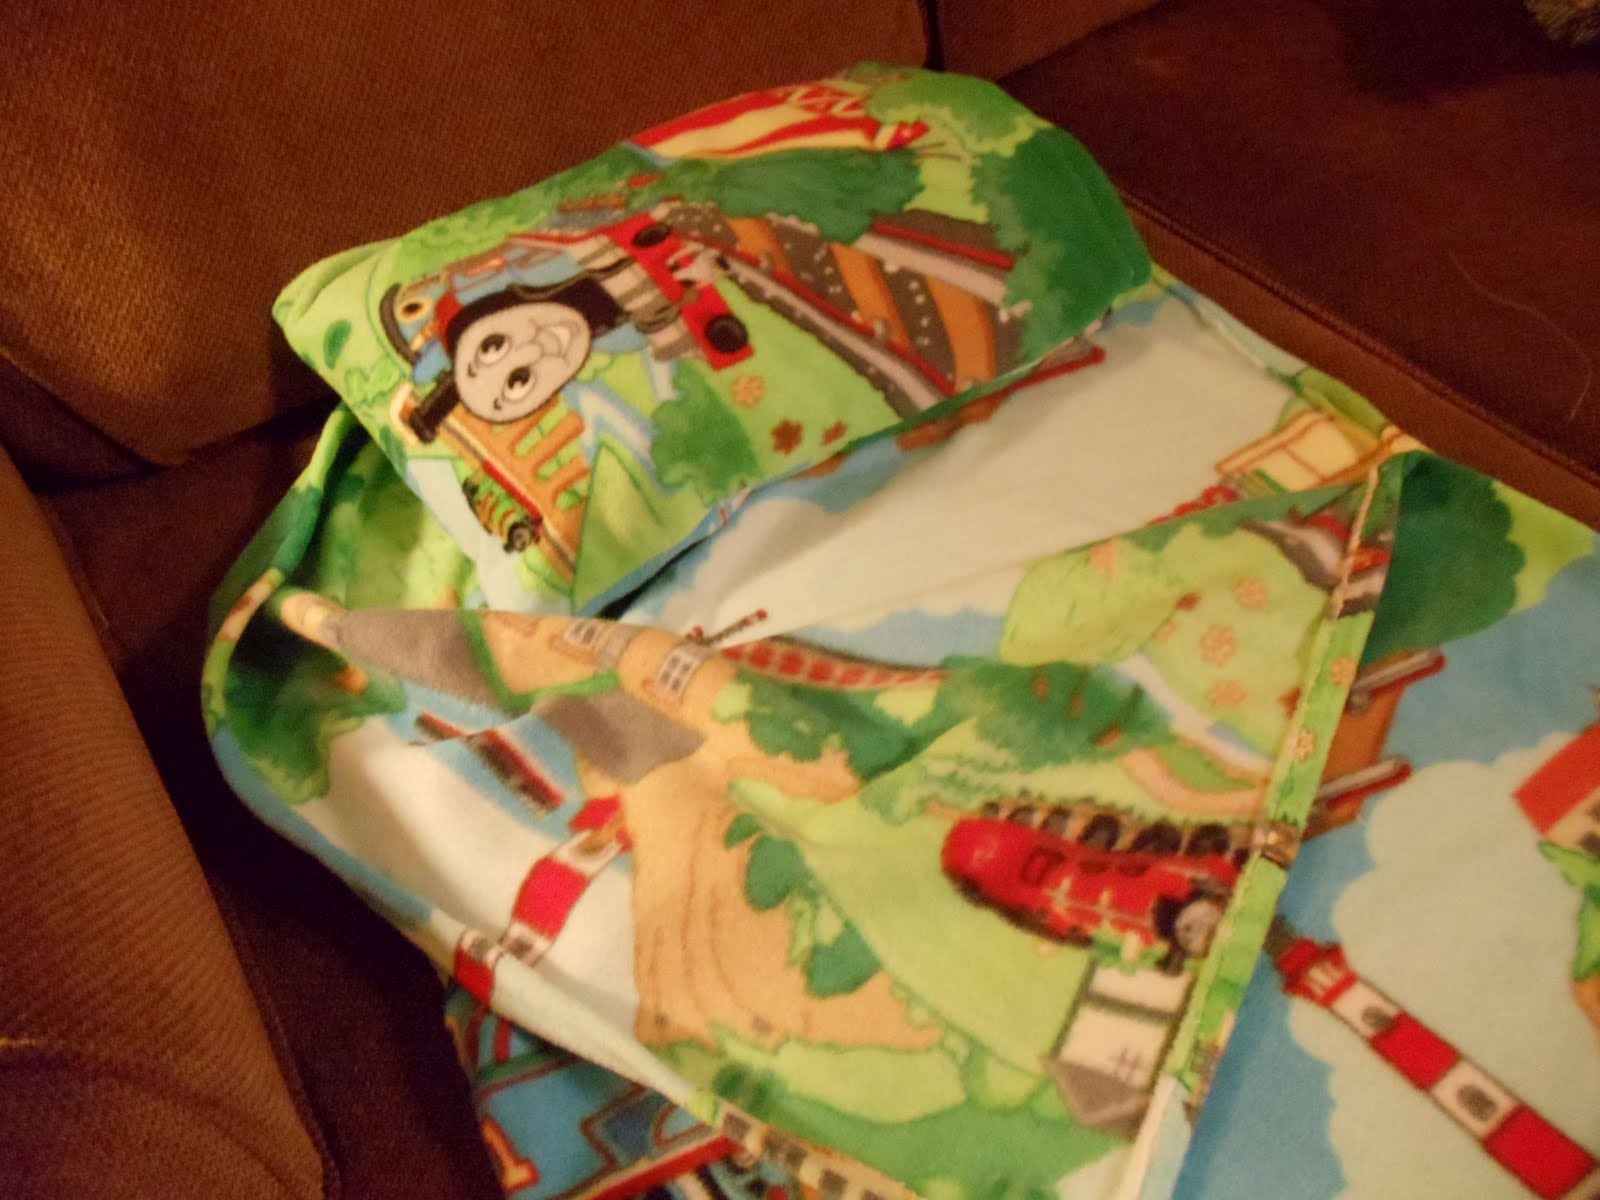
Fleece Sleeping Bags and Travel Size Pillows from Full-size Ones


In November, my favorite fabric store was having a big sale on fleece. It’s just amazing the beautiful patterns and designs that fleece comes in! And it’s also so easy to work with. You can cut it and it doesn’t ravel. It also sews easily and beautifully.


I have five grandchildren and three nieces and nephews…all under the age of 8, so I needed a good gift idea that wouldn’t be too expensive.  Several years ago my mom had given my teenagers something like a sleeping bag, but it was made of fleece and intended to be inserted into a real sleeping bag, as a liner or to be used alone for warmer weather.

I thought how much smaller children might like a little ‘sleeping bag’ that they could use on their beds, the floors, or Grandma’s couch. I decided to sew them myself and make little pillows to match. What I did was so easy that I was able to  make all six bags in one day!


For each bag and pillow, I bought about a yard and a third of fleece. I got different styles for older children, younger children and toddlers. For my grandson, Nikolai, I made a fleece version of the hooded bath towel that I showed you how to make in February. For the oldest grandchild I bought a yard and a half.


If you are looking for a quick gift to make a young child, maybe this is just the idea you are  looking for!

How to Make a Fleece Sleeping Bag
1. Buy enough yardage to equal the height of the person you are making the bag for, plus about 8” extra inches.


2. Fold the fabric in half lengthwise. Cut off about 12”-14” of fabric. Enough to make a pillow.


3. Sew the strip into a ‘pillowcase’. I made a hem of about an inch.


4. Cut a narrow strip of about 4” off the long side of the sleeping bag (from top to bottom) to make the bag a little narrower so it looks like a sleeping bag and not a fat rectangle.  Use this excess fabric to cut into ties later.

5. Open out the fabric for the bag and sew a hem from about 18” from the top edge on the left, across the top edge and down the right edge another 18”.
5. Now fold the fleece right sides together and stitch a half inch seam from the hemmed edge (18” down from the top edge) all the way down the length of the bag, across the bottom, and back up the left side. You are stitching the raw edges together leaving the hemmed edges loose. This gives the sleep bag enough fabric to fold down in order to get into the sleeping bag.


6.Use the long side strip to make a tie or two to hold the folded bag and pillow together. Either hem all sides of the strip, or make a tube out of it.
 

7. Firmly stitch the tie in place on the ‘back’ side of the sleeping bag at the opening, so that when you fold the bag up and lay the pillow on top, you can tie the tie in a knot.


8. To make the bag look more like a real ‘bag’, you can flatten out the seam at the bottom to make  two points on the end and stitch them down on the inside of the tube. This makes the end of the tube look and function more like a bag. This is totally optional.


How to Make Two or Three Child Size Pillows
out of a Full Size one.

If it’s summer time, you can buy travel pillows, but being winter, I couldn’t find any. So I bought a full size pillow and cut it in half and made new pillows. I also used some scrap white fabric to make a third. I could easily get three travel size pillows out of one full size one at the price of $2.50 or about .80 cents a piece.


1. Cut a full size pillow in half and remove the stuffing.


2. Sew the two halves of the pillow cover into two pillow covers leaving a small opening to  put stuffing in.


3. Stuff the pillow.


4. Stitch the opening closed by hand or by machine.
I think most children would adore a ‘sleeping bag’ like this! They could take it to school for naps, use it to ‘camp’ in the living room, or camp out on Grandma’s couch.

Of course, if you are really pressed for time. Just hem the raw edges  of a fleece square to make a 'blankie' and make the pillow case and at least you have a coordinating pillowcase and blanket set in cute cartoon  or child friendly designs. That’s a great gift any time of year!

Happy Homemaking!
Donna

17.12.10

Wonderful Gifts from Jill

Jill is the writer of Blessings of a Stay at Home Mom…and, my goodness, does she ever know how to host a giveaway! I’ve been visiting Jill for a couple of months now. She's a happy homemaker like me and signed up to follow Comin’ Home, so we started chatting back and forth..leaving friendly comments, like bloggers do. I fell in love with her darling daughters—they brought back so many memories of the precious moments I shared with my children when they were little, especially Rebekah.  They are the cutest little girls who always have big smiles on their faces. Jill does the sweetest things with her girls too…craft projects, recipes, school projects, and day trips.


In fact, I actually teared up at the most touching video of her youngest girl, Kathleen, practicing for a ballet recital.  It was priceless..and I laughed out loud. She’s a dancer in the making for sure.  The photos Jill takes are very good too—eye candy is what they call it :o). She’s a pretty amazing mom!


She had left a comment letting me know about her giveaway so of course, I did the neighborly thing and entered. :o) What are friends for? I just barely squeaked in at the end of the line…so the last thing I expected was to hear those thrilling words…You’ve won my giveaway!  Well, I wasn’t paying really close attention to all the things she was giving away. When I received her beautifully wrapped package, I was quite literally blown away--so many cute things!! It was like Christmas come early for me. :o) I just had to show you all the pretty things she sent me. Plus she wrote the kindest note and gave me a Christmas card too.


The boys aren’t crazy about my blogging..and tolerate it (with a lot of teasing on the side) but they are getting warmer towards the idea considering the consolation prize Jill sent…chocolate kisses..and lots of them—in fact a whole extra bag. I put some of those in the candy dish for hubby. :o)  Maybe Mom’s blogging isn’t such a weird hobby after all!  Tim had some of the chocolate and I think I caught him eyeing the hot cocoa too. He ADORES hot cocoa.  He needn’t have worried..I bought lots of flavors to put in his stocking. :o)
 

Rebekah nabbed the scented reed diffusers… She was sure she would find just the right place for all three…especially the gingerbread scented one. Hmmm… I do think that even after the family each chose their favorite things from the box that there were some cute things left over for me too. (Like a Snowman gift bag, snowman hand towel...and other snow man goodies. I really like snowmen!)

I especially love the darling Snowman coffee cup and photo holder! The ice cube looks so real, that I just couldn’t quit admiring it. And as I mentioned Thursday, the cocoa got me through the bottleneck of getting into the spirit of gift wrapping.


And if that wasn’t special enough…she sent an adorable teddy bear for my newest grandson, August. It made me thank the Lord anew just thinking of his newborn ups and downs and his stay in ICU when he was only ten days old. God was so good to clear up his breathing and blood infection issues!


I really just sat there staring at all the stuff in the box  the other evening thinking, "This just can’t be happening to me!"  I felt like the Lord had literally rained down blessings on me!   I couldn’t wait to say thanks publicly to Jill and to share my joy with you, my friends.  Perhaps some of these things will give you some good ideas for last minute Christmas gifts. I LOVE good ideas for gift giving..and Jill certainly seems to have a knack don’t you think?
I hope these photos help get you in the holiday spirit too. Jill’s gifts certainly reminded me yet again…that Christmas really is the season for giving.  Thanks again, Jill!

16.12.10

Gift Wrapping Made Simple


 Am I the only one who gets overwhelmed at the thought of wrapping, packing, and shipping Christmas gifts? I don't have such a problem with wrapping the gifts--I can live with that. But when you also expect a S.H.E. like me to scrounge around for the right sized boxes in which to pack them..and also find enough packing peanuts or other materials  to keep them safe until they arrive... well, Sister..then you are surely asking for trouble .LOL!  It's just too much for a 'visually' cued person like me to handle!!

I was so discouraged, the other day, at the sight of all those items to be wrapped..and the boxes all jumbled in a corner of the living room..and the garbage bags full of various packing materials that I've saved all year surrounding me...that I almost gave up altogether. First, I thought about cleaning the oven..or maybe writing a poem...or planting bulbs for next spring. I also considered going on vacation..but I don't think Christmas is the best time of year for that..regardless of what 'Mr. and Mrs. Crank' might think.   It just looked like way too big of a job!

gifts under tree 3

I'm sure it would have helped if I had worked at this a little bit at a time, but now that the kids are older, there seem to be so many evening activities, that I have to carve out a whole day..or two or three..to do this. I know, I should have gotten those packages in the mail five days ago, but two tires were on the brink of blowing out, and my 20yr. old daughter was about to drive to Dallas and back--by herself, and we had company for dinner...and went to visit family...and the weather was soooo.... lovely...

packages in boxes

Well, when it could be avoided no longer, I sat down to wrap gifts with Rebekah, my daughter, and we plugged away at it very valiantly (I thought) and then cratered and went to bed. The next morning, the sight in the living room was just too much for me. I determined to come up with a better plan.  I just can't stand working in chaos, so I organized all the piles, turned on the Christmas music, made a cup of cocoa and put it in my new penguin cup, (thank you Jill!), and went to work in a much better frame of mind than the day before.


Here are the steps I took to make gift wrapping simple....


1. Gather tape, scissors, ribbon, bows, packing tape, gift tags, mailing labels,  addresses (a print out or book), sharpie, and ink pen. Put it all in a pretty basket. :o) This way, we all know where these items go when we are not using them and I won't keep losing all of these items every time I wrap a gift. (I say 'we' because I assume you gathered recruits for this project--no child is too small! My kids have been 'wrapping' gifts for years!! :o)


2. Gather all the gift bags and tissue paper that could be used for Christmas gifts and put them in the biggest bag. Gift bags make gift wrapping immensely more simple. Grab your gift wrap paper and brown shipping  paper while you are at it.

3. Put all the bows  in another gift bag so they don't end up all over the floor when you are  trying to pick the 'perfect' color.


gifts to wrap

4. Gather all of the gifts you have purchased and put them in a laundry basket or two somewhere nearby. (Be sure to mark out all of the prices or remove the price tags, and of course, the receipts need to go in an envelope labeled 'Christmas' for possible future returns.)

packed boxes
5. Gather all of the miscellaneous boxes you can find in the house. (If you don't have enough, put this step off until tomorrow. Tonight, at 11pm to midnight or so, go 'shopping' at Wal-mart. You can drive your cart around everywhere and take all the boxes you like for free. Just don't take any marked 'Wal-mart' as they have to return those to their main headquarters.


6. Gather all of the packing peanuts and other materials that I hope you have saved for the last few months plus any grocery bag stash you might have. Grocery bags make great packing material!


7. Lay out all the boxes in a row by family so you can tell who gets what. Write the family name on the lid so you can tell who is who. Start with the packages that have to be shipped of course since it will take some time for them to get them.

jars in box

Go ahead and put the items in the boxes so you can tell that they will fit when wrapped. This will keep your living room much neater. Make sure that you leave plenty of room for packing material.

donna wrapping gifts

8. Now it's time to wrap those gifts--one destination at a time. Just do it! If you can put it in a gift bag..well then, by all means, do so! If not, well.. you know the drill. Hopefully, you have organized your supplies enough to stay fairly sane through the process. If you wrap all of one household's gifts at a time, then you will know you haven't left anyone out and even if you only do three or four boxes, you will be able to ship some of them tomorrow morning!

gifts under tree

 Once you have the gifts that need to be shipped out the door, you can wrap the rest in a more leisurely manner..which is a lot of fun of course. :o)

Now turn up the Bing Crosby music..and let's start wrapping!


4.12.10

Soup Mixes in a Jar


Hi Friends!  I thought you would enjoy seeing photos of a great and inexpensive gift idea for Christmas over the weekend. My very crafty daughter-in-law, Elisabeth,  got the idea to make these soup mixes in a jar from a book she picked up at a garage sale.  She wanted to make something for our upcoming Christmas Craft sale at Grace Community Church to earn some extra spending money for Christmas.

51MHTH4GQ2L._SS500_

I, on the other hand, was musing on what sort of gift I could make to give to friends and I’ve also been wanting to make some soups ‘ahead of time’ that I could just throw in the pot to simmer. I really have been wanting to improve my soup ‘repertoire’ and it always amazes me how things turn up just when I need them. This book, Gifts from a Jar, has the best recipes I’ve ever tried. It’s worth every penny!
 assembly line

You can imagine my excitement when Ebeth mentioned her idea. This is definitely a project for TWO people (plus I really enjoyed spending the day with her and the grandkids--Yippee!)  For one thing, you can go in together to buy the most critical ingredient for this project, dried vegetable flakes.  Ebeth found a good source online, and we split the cost. We ended up with quite a bit of extra, but this is a great additive to any soup you make, so I wasn’t complaining.

jars

We spent a Saturday morning shopping with the kiddos. (Great excuse to hang out with the grandbabies—Yea!)  Ebeth had ordered the online ingredients the week before which was critical. Just coming up with a shopping list for the 5 recipes we chose was quite an accomplishment all by itself.  Even with pooling the spices and extra beans, rice, barley etc. that we both had on hand, we still had to buy some extra supplies and ingredients. We bought a few things at Sam’s like bulk dehydrated onions, chicken bullion cubes and cumin.  Diced and dehydrated garlic and the vegetable flakes both had to be purchased online.  We both had jars on hand that we had to wash and dry, but we also bought extras.

spooning ingredients into jars

Between the two of us, we made 71 jars of soup mix!  We figured up our costs and on average we spent about $1.50 to $2.00 per soup mix (including the price of the jar). I think Ebeth could sell her jars for at least $5-6.00 a piece.  For my part, I’m just happy to have a well stocked pantry and now I also have a nice, inexpensive gift to give to friends at church and neighbors too. Plus I’ll tuck a few into the Christmas boxes I ship. What a great gift to have on hand for that surprise person that you left off of your list too! 

recipe

I packed a bag with the Chicken and Rice soup mix plus a can of chicken breast chunks, and tomato sauce for my secret sister as a ‘thank you’ for all the gifts she gave me. Plus I sent a Chili Mac & Beans casserole jar plus a can of tomatoes with green peppers to my own secret sister in a quilted tote bag for her Christmas gift. It’s so nice to have a little something on hand for gift giving during this busy season, don’t you think?  

Italian pasta soup

We made the beef, lentil, and barley soup the other day and it was just heavenly! I loved the recipes so much, that I ordered the Gifts in a Jar~ Cookie Mixes too from Amazon. Of course, I bought it used. Why not? It looked brand new and even had fabric circles and raffia twine still in a bag inside the front cover. But Wal-mart also sells pre-cut circle scraps. They are in the canning section.  I gathered a bunch of scraps in colors that I thought Ebeth would like and loaned her my pinking shears so she can make fabric circles for her jars. 

jars of soup mix

Really, this is pretty easy, but if you are planning to do a bunch of jars or recipes, like we did, then we suggest that you shop on one day and do the work on the next day. It’s a BIG job! We ordered pizza for dinner. We sure didn’t feel like cooking! Ha!

DSC02370

There are so many resources on the internet for crockpot meals in a jar, soups, cookies, muffins, etc. Just do a quick search for “Gifts in a Jar” and you will find some great ideas for cooking ahead for your family as well as an inexpensive Christmas gift idea that’s a lot of fun to do and special to share as well.

What about you? What is your favorite gift to give for friends and neighbors?

Happy Homemaking!
 signature


“There's nothing half so pleasant as coming home again.” ~ Margaret Sangster

Friends of Comin' Home

Thanks for visiting!

Search This Blog

Followers

Copyright Comin'Home 2020. Powered by Blogger.

Error 404

The page you were looking for, could not be found. You may have typed the address incorrectly or you may have used an outdated link.

Go to Homepage